You cannot select more than 25 topics
Topics must start with a letter or number, can include dashes ('-') and can be up to 35 characters long.
|
|
1 year ago | |
|---|---|---|
| Lenna.png | 1 year ago | |
| README.md | 1 year ago | |
| grabcut.py | 1 year ago | |
| k-means.py | 1 year ago | |
| seg1.png | 1 year ago | |
| seg2.png | 1 year ago | |
| seg3.png | 1 year ago | |
| seg4.png | 1 year ago | |
| seg5.png | 1 year ago | |
| seg6.png | 1 year ago | |
| seg7.png | 1 year ago | |
| watershed.py | 1 year ago | |
README.md
| layout | title | subtitle |
|---|---|---|
| default | 10. Image Segmentation | 산업비전의실제 과목 |
Image Segmentation
- 산업인공지능학과 대학원 2022254026 김홍열
*Image Segmentation
K-Means, Watershed, GrabCut을 통한 이미지 분할
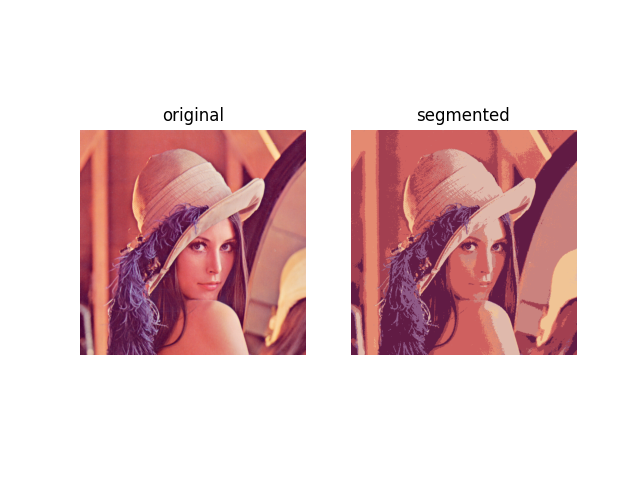
오늘은 이미지 분할(Image Segmentation)의 세 가지 대표적인 방법 즉, K-Means, Watershed, 그리고 GrabCut에 대해 알아보려고 합니다. 이미지 분할은 이미지를 의미 있는 영역으로 나누는 과정입니다.
1. 이미지 분할이란?
이미지 분할은 이미지를 여러 개의 세그먼트(segment)나 영역으로 나누는 과정입니다. 이를 통해 우리는 이미지 내의 특정 객체나 구조를 식별하고 분석할 수 있습니다.
2. K-Means를 이용한 분할
- 원리: K-Means는 클러스터링 알고리즘으로, 이미지의 픽셀 값을 기반으로 유사한 픽셀을 그룹화합니다.
- 작동 방식: 이미지의 각 픽셀에 대한 색상 값 (RGB 또는 HSV)을 사용하여 K 개의 클러스터를 형성합니다.
- 사용 사례: 이미지의 색상 기반 분할, 배경과 전경의 분리 등.
예제 코드
K-Means
import cv2
import numpy as np
import matplotlib.pyplot as plt

image = cv2.imread('./Lenna.png').astype(np.float32) / 255.
image_lab = cv2.cvtColor(image, cv2.COLOR_BGR2Lab)

data = image_lab.reshape((-1, 3))

num_classes = 8
criteria = (cv2.TERM_CRITERIA_EPS + cv2.TERM_CRITERIA_MAX_ITER, 50, 0.1)
_, labels, centers = cv2.kmeans(data, num_classes, None, criteria, 10, cv2.KMEANS_RANDOM_CENTERS)

segmented_lab = centers[labels.flatten()].reshape(image.shape)
segmented = cv2.cvtColor(segmented_lab, cv2.COLOR_Lab2RGB)

plt.subplot(121)
plt.axis('off')
plt.title('original')
plt.imshow(image[:,:,[2,1,0]])
plt.subplot(122)
plt.axis('off')
plt.title('segmented')
plt.imshow(segmented)
plt.show()
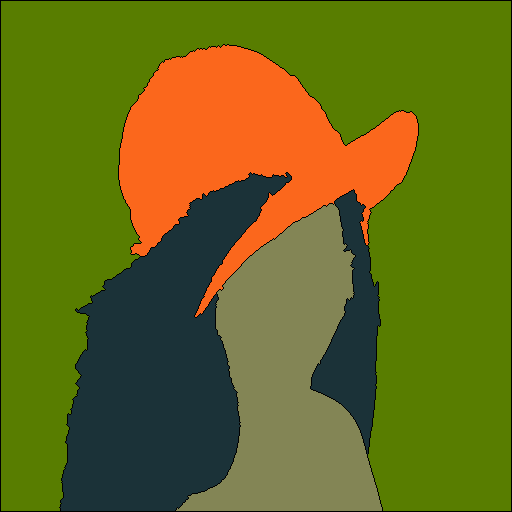
3. Watershed 알고리즘
- 원리: Watershed는 이미지의 그레이디언트를 '지형'으로 간주하고, '물'을 주입하여 분리된 영역을 생성하는 방식으로 작동합니다.
- 작동 방식: 이미지의 그레이디언트를 계산한 후, 지역 최소값에서 시작하여 '물'을 주입하면서 영역을 확장합니다.
- 사용 사례: 객체의 경계 탐지, 미세한 구조물 분리 등.
예제 코드
Watershed
import cv2
import numpy as np
from random import randint

img = cv2.imread('./lenna.png')
show_img = np.copy(img)

seeds = np.full(img.shape[0:2], 0, np.int32)
segmentation = np.full(img.shape, 0, np.uint8)

n_seeds = 9

colors = []
for m in range(n_seeds):
    colors.append((255 * m / n_seeds, randint(0, 255), randint(0, 255)))


mouse_pressed = False
current_seed = 1
seeds_updated = False


def mouse_callback(event, x, y, flags, param):
    global mouse_pressed, seeds_updated

    if event == cv2.EVENT_LBUTTONDOWN:
        mouse_pressed = True
        cv2.circle(seeds, (x, y), 5, (current_seed), cv2.FILLED)
        cv2.circle(show_img, (x, y), 5, colors[current_seed - 1], cv2.FILLED)
        seeds_updated = True

    elif event == cv2.EVENT_MOUSEMOVE:
        if mouse_pressed:
            cv2.circle(seeds, (x, y), 5, (current_seed), cv2.FILLED)
            cv2.circle(show_img, (x, y), 5, colors[current_seed - 1], cv2.FILLED)
            seeds_updated = True

    elif event == cv2.EVENT_LBUTTONUP:
        mouse_pressed = False


cv2.namedWindow('image')
cv2.setMouseCallback('image', mouse_callback)

while True:
    cv2.imshow('segmentation', segmentation)
    cv2.imshow('image', show_img)

    k = cv2.waitKey(1)

    if k == 27:
        break;
    elif k == ord('c'):
        show_img = np.copy(img)
        seeds = np.full(img.shape[0:2], 0, np.int32)
        segmentation = np.full(img.shape, 0, np.uint8)
    elif k > 0 and chr(k).isdigit():
        n = int(chr(k))
        if 1 <= n <= n_seeds and not mouse_pressed:
            current_seed = n

    if seeds_updated and not mouse_pressed:
        seeds_copy = np.copy(seeds)
        cv2.watershed(img, seeds_copy)
        segmentation = np.full(img.shape, 0, np.uint8)
        for m in range(n_seeds):
            segmentation[seeds_copy == (m + 1)] = colors[m]

        seeds_updated = False

cv2.destroyAllWindows()
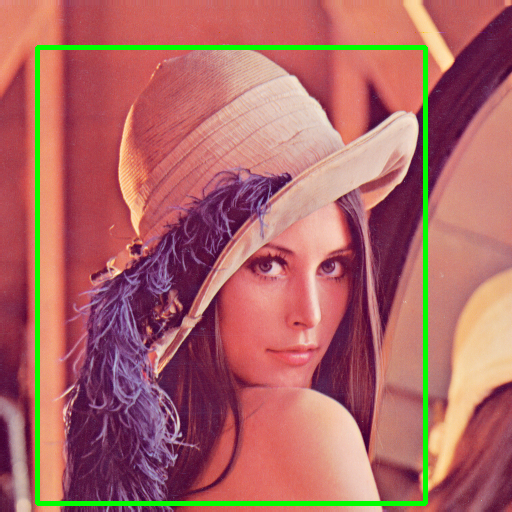
4. GrabCut 알고리즘
- 원리: GrabCut은 사용자의 간단한 주석(예: 전경과 배경의 대략적인 경계)을 기반으로 이미지를 분할합니다.
- 작동 방식: 초기 주석을 기반으로 그래프 컷(Graph Cut) 알고리즘을 사용하여 최적의 분할을 찾습니다.
- 사용 사례: 객체 추출, 이미지 편집, 배경 제거 등.
예제 코드
Grabcut
import cv2
import numpy as np

img = cv2.imread('./lenna.png', cv2.IMREAD_COLOR)
show_img = np.copy(img)

mouse_pressed = False
y = x = w = h = 0


def mouse_callback(event, _x, _y, flags, param):
    global show_img, x, y, w, h, mouse_pressed

    if event == cv2.EVENT_LBUTTONDOWN:
        mouse_pressed = True
        x, y, = _x, _y
        show_img = np.copy(img)

    elif event == cv2.EVENT_MOUSEMOVE:
        if mouse_pressed:
            show_img = np.copy(img)
            cv2.rectangle(show_img, (x, y), (_x, _y), (0, 255, 0), 3)

    elif event == cv2.EVENT_LBUTTONUP:
        mouse_pressed = False
        w, h = _x - x, _y - y


cv2.namedWindow('image')
cv2.setMouseCallback('image', mouse_callback)

while True:
    cv2.imshow('image', show_img)
    k = cv2.waitKey(1)

    if k == ord('a') and not mouse_pressed:
        if w * h > 0:
            break

cv2.destroyAllWindows()

labels = np.zeros(img.shape[:2], np.uint8)
labels, bgdModel, fgdModel = cv2.grabCut(img, labels, (x, y, w, h), None, None, 5, cv2.GC_INIT_WITH_RECT)

show_img = np.copy(img)
show_img[(labels == cv2.GC_PR_BGD) | (labels == cv2.GC_BGD)] //= 3

cv2.imshow('image', show_img)
cv2.waitKey()
cv2.destroyAllWindows()


label = cv2.GC_BGD
lbl_clrs = {cv2.GC_BGD: (0, 0, 0), cv2.GC_FGD: (255, 255, 255)}


def mouse_callback(event, x, y, flags, param):
    global mouse_pressed

    if event == cv2.EVENT_LBUTTONDOWN:
        mouse_pressed = True
        cv2.circle(labels, (x, y), 5, label, cv2.FILLED)
        cv2.circle(show_img, (x, y), 5, lbl_clrs[label], cv2.FILLED)

    elif event == cv2.EVENT_MOUSEMOVE:
        if mouse_pressed:
            cv2.circle(labels, (x, y), 5, label, cv2.FILLED)
            cv2.circle(show_img, (x, y), 5, lbl_clrs[label], cv2.FILLED)

    elif event == cv2.EVENT_LBUTTONUP:
        mouse_pressed = False


cv2.namedWindow('image')
cv2.setMouseCallback('image', mouse_callback)

while True:
    cv2.imshow('image', show_img)
    k = cv2.waitKey(1)

    if k == ord('a') and not mouse_pressed:
        break

    elif k == ord('1'):
        label = cv2.GC_FGD - label

cv2.destroyAllWindows()


labels, bgdModel, fgdModel = cv2.grabCut(img, labels, None, bgdModel, fgdModel, 5, cv2.GC_INIT_WITH_MASK)
show_img = np.copy(img)
show_img[(labels == cv2.GC_PR_BGD) | (labels == cv2.GC_BGD)] //= 3

cv2.imshow('image', show_img)
cv2.waitKey()
cv2.destroyAllWindows()
5. 결론
이미지 분할은 컴퓨터 비전의 핵심 작업 중 하나로, 다양한 알고리즘과 기법이 개발되어 왔습니다. K-Means, Watershed, GrabCut은 그 중에서도 널리 사용되는 방법들입니다. 각 방법은 특정 상황과 요구 사항에 따라 장점과 단점을 가지므로, 적절한 알고리즘을 선택하는 것이 중요합니다.
이렇게 이미지 분할의 세 가지 대표적인 방법을 간략하게 소개하는 블로그 포스트를 작성해 보았습니다. 다음 포스트에서는 실제 코드 예제와 함께 각 방법의 실제 응용 사례를 살펴보는 것도 좋을 것 같습니다!
참고
- 산업비전의실제 과목, 박태형 교수
- ChatGPT


